A Linux box at home can run Cockpit, a dev environment, a monitoring dashboard, and file services, but home broadband often has no public IPv4 address. So-called “intranet penetration” is, at its core, about establishing a path for an external device to reach a service on your home network.
This article covers four common approaches:
- Using a public IPv6 address assigned directly by your ISP;
- Setting up an SSH reverse tunnel through a VPS with a public IP;
- Using Cloudflare Tunnel to publish a web or SSH service;
- Using Tailscale to build a private network open only to authorized devices.
A security principle: remote access does not mean exposing a service to the entire internet. SSH, Cockpit, databases, and management dashboards should prioritize a private network or identity-based authentication; only web services that genuinely need public access should get a public hostname.
1. Choosing the Right Approach First
| Approach | Extra requirement | Best suited for | Publishes a service port? | Main limitation |
|---|---|---|---|---|
| Public IPv6 | Your ISP provides an inbound-capable IPv6 address | Self-managed SSH, HTTPS services | Yes | The address may change, and both the router and host firewall must be configured correctly |
| SSH reverse tunnel | A VPS with a public IP | Temporary forwarding, a fully self-controlled operations channel | The VPS needs at least SSH open | Requires maintaining the VPS, keys, and a long-lived connection |
| Cloudflare Tunnel | A Cloudflare account; a public hostname also needs a hosted domain | Publishing web applications, or accessing SSH via Access | No | Non-HTTP services like SSH need the client-side cloudflared or the Cloudflare One Client |
| Tailscale | A client installed on both the accessing and target devices | Personal devices, team operations, an entire home LAN | No | The accessing device needs to join the same tailnet; depends on Tailscale’s control plane |
For personal and home environments, I usually reach for Tailscale first — no domain, VPS, or router port mapping needed. When ordinary visitors need to access a web application, I switch to Cloudflare Tunnel. Public IPv6 and SSH reverse tunnels suit people who want to control the network path themselves.
2. Direct Access via Public IPv6
Scarce public IPv4 doesn’t mean a home network necessarily has no public address at all. Many ISPs hand out globally unique unicast IPv6 addresses; as long as inbound traffic isn’t blocked by the ISP or the router, you can access a machine at home directly.
2.1 Confirm the Host Has a Global IPv6 Address
Check the address and default route on the internal host:
ip -6 address show scope global
ip -6 route show default
fe80::/10 is a link-local address, only usable within the same layer-2 network; fc00::/7 belongs to unique local addresses, and can’t be reached directly from the public internet either. What’s needed here is a globally routable unicast address. Definitions for the various address types can be found in RFC 4291.
Next, confirm the host can reach the IPv6 internet outbound:
ping -6 -c 4 2606:4700:4700::1111Successful outbound access still doesn’t mean the public internet can reach in. You also need to check the IPv6 firewall on your modem or router. IPv6 usually doesn’t need IPv4-style NAT port forwarding, but home routers often default to rejecting all inbound connections.
2.2 Configure SSH and the Firewall
First confirm SSH is listening on IPv6:
sudo ss -lntp | grep ':22'Seeing [::]:22 in the output means sshd is listening on an IPv6 address. On a system using firewalld, allow the SSH service:
sudo firewall-cmd --permanent --add-service=ssh
sudo firewall-cmd --reload
sudo firewall-cmd --list-services
You’ll also need to allow TCP 22 in the router’s IPv6 inbound rules. If you can restrict the source IPv6 prefix, only allow your own office network or mobile device addresses, rather than opening it to every source.
Before disabling password login, first set up and verify a public key:
ssh-keygen -t ed25519 -a 100
ssh-copy-id [email protected]
Once you’ve confirmed a new terminal can log in with the key, create /etc/ssh/sshd_config.d/50-hardening.conf:
PermitRootLogin no
PubkeyAuthentication yes
PasswordAuthentication no
Check the configuration, then reload sshd smoothly — don’t interrupt your current session directly:
sudo sshd -t
sudo systemctl reload sshd
2.3 Set Up an AAAA Record and Test
If the IPv6 address is stable, you can add a DNS AAAA record for the domain:
home.example.com. AAAA 2001:db8:1234:5678::102001:db8::/32 here is a documentation example address, and must be replaced with your own real address. If DNS is managed via Cloudflare, the AAAA record for direct SSH connections should be set to DNS only — a regular Cloudflare-proxied record won’t forward a raw SSH connection to the host.
Then test from a genuinely external IPv6 network, not from inside your home Wi-Fi:
ssh -6 [email protected]If your ISP periodically rotates its IPv6 prefix, you’ll need dynamic DNS. When the address or prefix changes frequently, Tailscale or Cloudflare Tunnel is usually much less hassle.
3. Using an SSH Reverse Tunnel
SSH remote port forwarding has the internal host actively connect out to the VPS, letting a listening port on the VPS route back to the internal service. The whole process only requires the internal host to be able to reach the internet — it doesn’t require the home network to have a public address.
The example below forwards port 22 on the home host to 127.0.0.1:2022 on the VPS. The listening address deliberately uses the loopback address, to avoid exposing the forwarded port directly to the public internet.
3.1 Preparing the VPS
Any VPS that can run OpenSSH reliably and has a public IP will do. First complete a system update, set up a regular admin account, and configure the firewall; for a more thorough baseline hardening pass, see Securing a Cloud Server.
Taking RHEL, Fedora, or a compatible distribution as an example:
sudo dnf install -y openssh-server
sudo systemctl enable --now sshd
sudo firewall-cmd --permanent --add-service=ssh
sudo firewall-cmd --reload
If the cloud provider also has a separate security group layer, you only need to open the VPS’s SSH port there. There’s no need to add a public rule for 2022, since it only listens on the VPS’s loopback address.
3.2 Creating a Dedicated Tunnel User
Don’t have the tunnel use the VPS’s root account or your regular admin account long-term:
sudo useradd --create-home tunnel
sudo passwd tunnel
Generate a dedicated Ed25519 key on the home host, and copy it to the VPS:
ssh-keygen -t ed25519 -a 100 -f ~/.ssh/id_ed25519_tunnel
ssh-copy-id -i ~/.ssh/id_ed25519_tunnel.pub [email protected]
The first time you connect, manually verify the host fingerprint through the VPS console or information provided by your cloud provider. Once you’ve confirmed the dedicated key can authenticate, immediately lock the tunnel user’s password on the VPS — locking the password doesn’t affect public-key authentication:
ssh -NT -i ~/.ssh/id_ed25519_tunnel [email protected]
# In a separate VPS management session, run:
sudo passwd --lock tunnel
The first test command keeps the connection open — once you’ve confirmed there’s no authentication error, press Ctrl+C to exit.
3.3 Restricting Remote Forwarding Privileges
On the VPS, create /etc/ssh/sshd_config.d/60-reverse-tunnel.conf:
Match User tunnel
    PasswordAuthentication no
    AllowAgentForwarding no
    AllowTcpForwarding remote
    GatewayPorts no
    PermitListen 127.0.0.1:2022
    PermitTTY no
    MaxSessions 0

Match all
These settings only allow the tunnel user to set up remote forwarding, and only to listen on 127.0.0.1:2022; MaxSessions 0 blocks shell, command, and SFTP sessions, while still allowing port forwarding. Compared to directly setting GatewayPorts yes, this avoids accidentally exposing an arbitrary forwarded port to the VPS’s public network interface. The exact meaning of each directive can be found in OpenSSH’s sshd_config manual.
You must check the syntax before applying it:
sudo sshd -t
sudo systemctl reload sshd
3.4 Establishing and Verifying the Tunnel
On the home host, run:
ssh -NT \
  -o ExitOnForwardFailure=yes \
  -o ServerAliveInterval=30 \
  -o ServerAliveCountMax=3 \
  -i ~/.ssh/id_ed25519_tunnel \
  -R 127.0.0.1:2022:127.0.0.1:22 \
[email protected]-Nmeans don’t execute a remote command;-Tmeans don’t allocate a pseudo-terminal;-Rsets up remote port forwarding;ExitOnForwardFailuremakes SSH exit immediately if the listener fails;ServerAliveIntervalandServerAliveCountMaxare used to detect a dead connection.
After logging into the VPS, verify the listening address:
ss -lnt | grep 2022
ssh -p 2022 [email protected]
An external computer can use the VPS as a jump host — the VPS admin account and the tunnel account should be kept separate:
ssh -J [email protected] -p 2022 [email protected]3.5 Automatic Reconnection with systemd
OpenSSH’s keepalive detection combined with systemd’s restart policy is already reliable enough to maintain the tunnel — there’s no strict need to install autossh as well.
On the home host, create /etc/systemd/system/ssh-reverse-tunnel.service. Be sure to replace the username, home directory, and domain with actual values — systemd’s ExecStart doesn’t expand ~:
[Unit]
Description=Reverse SSH tunnel to VPS
Wants=network-online.target
After=network-online.target

[Service]
Type=simple
User=home_user
ExecStart=/usr/bin/ssh -NT \
  -o BatchMode=yes \
  -o ExitOnForwardFailure=yes \
  -o ServerAliveInterval=30 \
  -o ServerAliveCountMax=3 \
  -i /home/home_user/.ssh/id_ed25519_tunnel \
  -R 127.0.0.1:2022:127.0.0.1:22 \
  [email protected]
Restart=always
RestartSec=10

[Install]
WantedBy=multi-user.target
Enable it and check the logs:
sudo systemctl daemon-reload
sudo systemctl enable --now ssh-reverse-tunnel.service
systemctl status ssh-reverse-tunnel.service
journalctl -u ssh-reverse-tunnel.service -f
Only change GatewayPorts to clientspecified — and change the -R listen address to 0.0.0.0 or :: — if you genuinely want the VPS’s 2022 to listen directly on the public internet. You must also restrict the source address with the VPS’s firewall or security group in that case. For administrative SSH, prefer keeping the loopback listener and ProxyJump instead.
4. Using Cloudflare Tunnel
Cloudflare Tunnel runs cloudflared on the internal network, which actively establishes an outbound connection to Cloudflare. So your home network doesn’t need a public IP, and you don’t need to open any inbound port on the router.
Publishing a web application and publishing SSH work differently:
- HTTP/HTTPS can be published as a regular hostname;
- SSH, RDP, and arbitrary TCP services require
cloudflaredon the accessing side, or access to the private subnet via the Cloudflare One Client; - Cloudflare Access can add identity verification and access policy before a request ever reaches the origin.
4.1 Creating a Tunnel
A public hostname requires a domain already onboarded to Cloudflare. Go to Networking → Tunnels in the Cloudflare dashboard, and create a cloudflared Tunnel. The dashboard’s naming may shift between versions — defer to the official Tunnel setup documentation.
Once created, the dashboard generates an installation command containing the Tunnel token. The token is equivalent to that tunnel connector’s credential — don’t put it in an article, a Git repository, a screenshot, or a container image; if it’s ever leaked, rotate it immediately.
4.2 Running cloudflared with Docker Compose
Create .env:
TUNNEL_TOKEN=replace_with_the_real_token_from_the_dashboardRestrict its file permissions, and make sure it’s in .gitignore:
chmod 600 .envCreate compose.yaml:
services:
  cloudflared:
    image: cloudflare/cloudflared:latest
    restart: unless-stopped
    command: tunnel --no-autoupdate run --token ${TUNNEL_TOKEN}
    extra_hosts:
      - "host.docker.internal:host-gateway"
Start it and check the logs:
docker compose up -d
docker compose logs -f cloudflared
localhost inside the container refers to the container itself, not the Docker host. When the origin service is on the host, you can use host.docker.internal along with the host-gateway mapping above; when the origin service is also a container, it’s best to put both services on the same Docker network and use the Compose service name, e.g. http://grafana:3000.
4.3 Publishing a Web Application
Open the tunnel you just created, and add a Published application under Routes:
Hostname: cockpit.example.com
Service URL: https://host.docker.internal:9090
If cloudflared is installed directly on the host rather than in a container, you can use https://localhost:9090 instead. When the origin uses a self-signed certificate, it’s better to have cloudflared trust the correct CA — only enable No TLS Verify in Origin settings once you clearly understand the risk.
A tunnel only solves network reachability. Cockpit, admin dashboards, and internal tools should also have a Cloudflare Access self-hosted application set up, with allowed identities, email domains, or user groups configured. Access is an extra line of defense before the origin’s own authentication — it’s not a substitute for the origin’s own accounts and permission control.
4.4 Connecting to SSH Through Cloudflare Access
In the tunnel’s Routes, add a Published application:
Hostname: ssh.example.com
Service: SSH
Service URL: localhost:22
Then create a Cloudflare Access self-hosted application and an allow policy for ssh.example.com. The accessing side also needs cloudflared installed, with this added to ~/.ssh/config:
Host ssh.example.com
    ProxyCommand /usr/local/bin/cloudflared access ssh --hostname %h
The actual path may differ depending on the install method (such as macOS Homebrew) — you can look it up with command -v cloudflared. When connecting, a browser window opens for identity verification:
ssh [email protected]This approach doesn’t forward public port 22 directly to your home — instead, the client-side cloudflared establishes a connection that’s been verified through Access. For the complete steps, see Cloudflare’s client-side cloudflared SSH guide.
If you want to access a variety of non-HTTP services just as you would on a LAN, you can add an internal IP/CIDR route to the tunnel, then have authorized devices connect via the Cloudflare One Client. This mode requires device registration, split tunneling, and Gateway network policy — see the private network routing documentation for details.
4.5 Example: Securely Publishing Cockpit
Install Cockpit on RHEL, Fedora, or a compatible distribution:
sudo dnf install -y cockpit
sudo systemctl enable --now cockpit.socket
sudo ss -lntp | grep 9090
Cockpit uses HTTPS port 9090 by default. After setting up the tunnel, add a Cloudflare Access policy to the hostname as well. Don’t use a weak password just because there’s a tunnel in front of it, and don’t expose 9090 to the public internet at the same time.
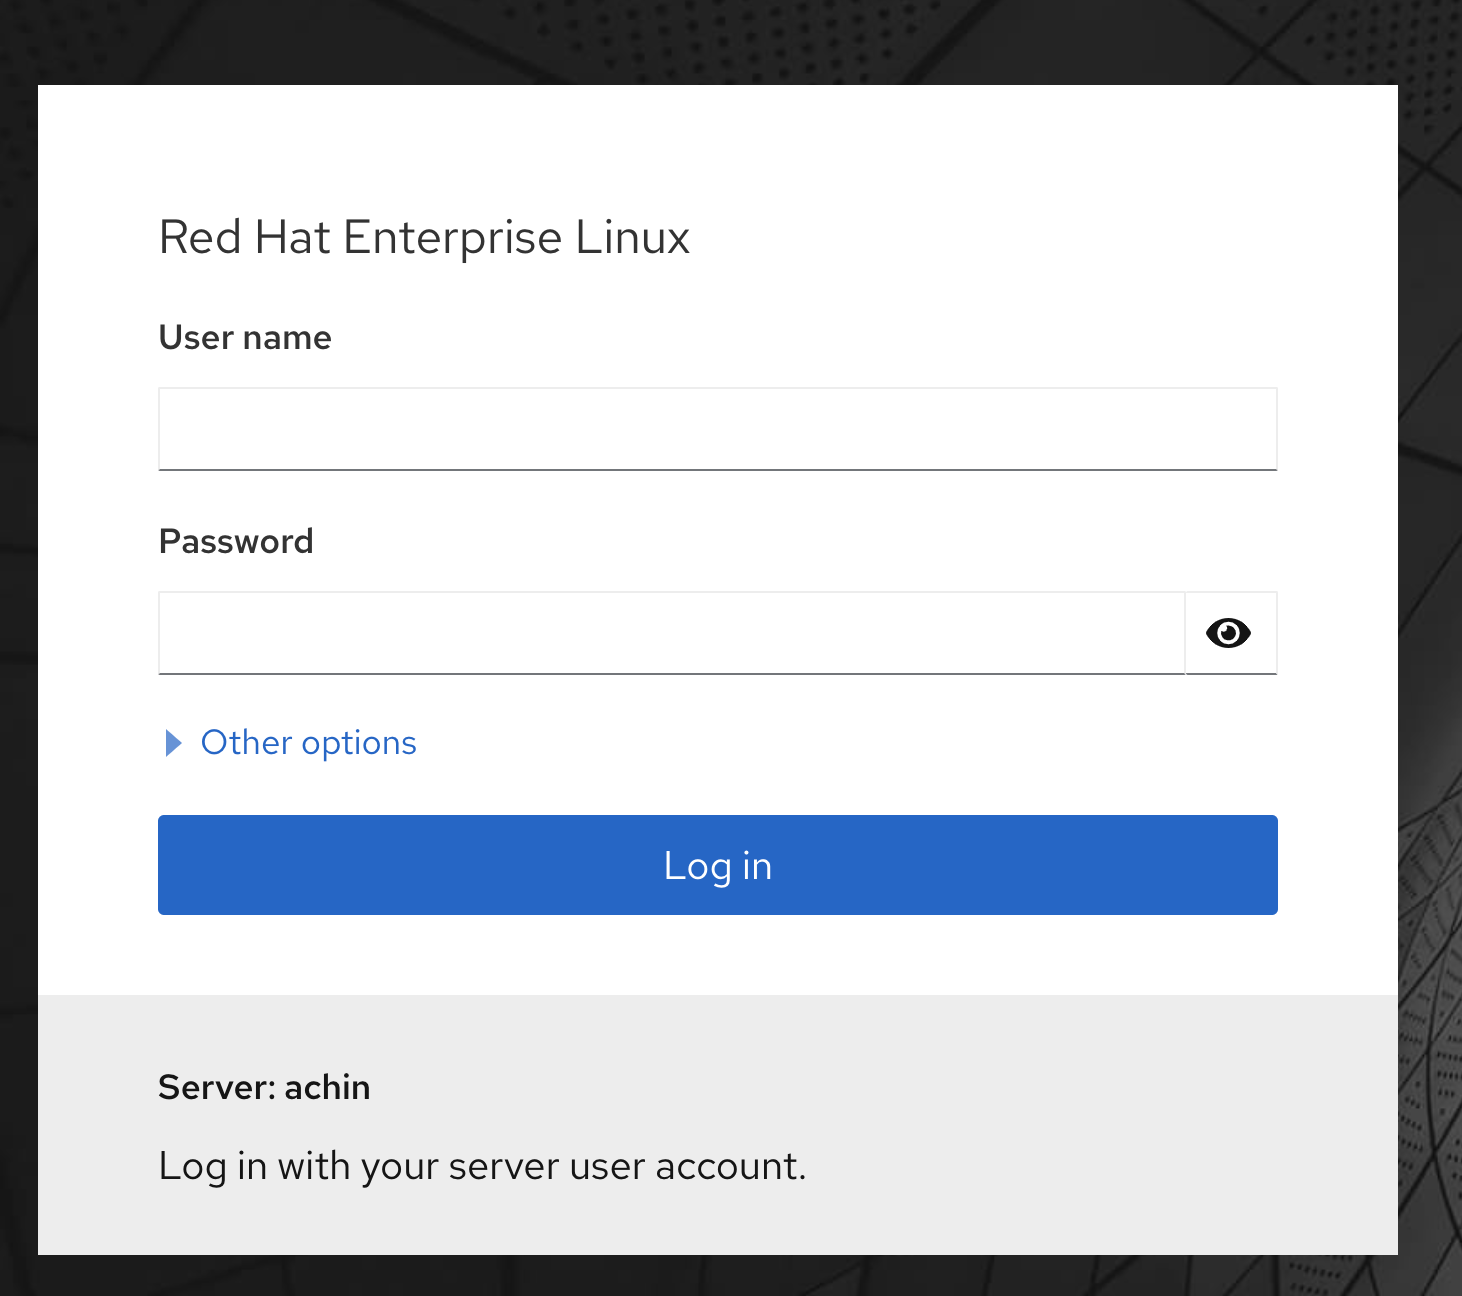
5. Using Tailscale
Tailscale builds a private tailnet for your devices on top of WireGuard. It prefers a direct connection between devices where possible, falling back to relaying when a direct connection isn’t possible. Either way, there’s no need to open an SSH or Cockpit port on your home router.
5.1 Installing on Both Sides and Joining the tailnet
Linux can use the official install script; if you’d rather not run curl | sh, you can also follow the official package repository documentation to install manually:
curl -fsSL https://tailscale.com/install.sh | sh
sudo tailscale up
tailscale status
tailscale ip
Install Tailscale on your laptop or phone, logging in with the same organization’s identity. Once MagicDNS is enabled, you can access by device name directly:
tailscale ping home-server
ssh home_user@home-server
This still uses the system’s regular OpenSSH and key-based authentication — the network traffic is simply routed to the target host over the tailnet. Other ports can be accessed too:
https://home-server:9090
http://home-server:3000
5.2 Accessing Both the Intranet and the Internet Through a Single Domain
Home services commonly run into an address fragmentation problem: using 10.x.x.x while at home, then switching to a VPN address or a different reverse-proxy domain once away from the home network. A simpler design is to always use the same domain both inside and outside, and have it resolve to the service’s internal IP:
immich.home.example.com -> 10.0.0.20
grafana.home.example.com -> 10.0.0.20
Devices on the home LAN access this internal address directly; external devices, once joined to the tailnet, reach the same subnet through a Tailscale subnet router. Here, Tailscale isn’t giving each service a new 100.x.x.x address — it’s acting as a secure remote LAN route.
To let external devices resolve the same set of internal domains, you can configure Split DNS in Tailscale, handing queries for internal domains like home.example.com off to your home DNS. This way, each layer only handles one responsibility:
- DNS resolves the unified domain to the internal IP;
- Tailscale lets an external device route to the home intranet;
- Nginx forwards the request to the corresponding service based on the domain.
The client never needs to figure out whether it’s currently at home, at work, or on mobile data — it just always accesses https://immich.home.example.com. The subnet router, Split DNS, and HTTPS certificate can each be configured independently, without needing to build a separate external-address scheme for every service.
5.3 Optional: Enabling Tailscale SSH
Tailscale SSH can manage SSH authentication using tailnet identity and policy, without needing to distribute traditional SSH public keys. Enable it on the server:
sudo tailscale set --sshDon’t stick with broad default access rules long-term in production. New network access rules should use grants, while Tailscale SSH identity rules go in their own separate ssh section. Below is an example structure restricting things to non-root SSH — replace the users and tags before saving, and verify the policy in the admin console:
{
  "groups": {
    "group:home-admins": ["[email protected]"]
  },
  "tagOwners": {
    "tag:home-server": ["group:home-admins"]
  },
  "grants": [
    {
      "src": ["group:home-admins"],
      "dst": ["tag:home-server"],
      "ip": ["tcp:22", "tcp:9090"]
    }
  ],
  "ssh": [
    {
      "action": "check",
      "src": ["group:home-admins"],
      "dst": ["tag:home-server"],
      "users": ["autogroup:nonroot"],
      "checkPeriod": "12h"
    }
  ]
}
check requires users to periodically re-authenticate. Policy syntax and features are updated regularly — refer to both the Grants and Tailscale SSH official documentation together.
You’ll also need to assign tag:home-server to the target device, either on the Machines page or when registering the server — otherwise the target selector above won’t match that server.
5.4 Accessing Intranet Devices That Can’t Install Tailscale
Devices like printers, NAS units, and cameras often can’t have a client installed. In that case, you can have a Linux host that’s always on act as a subnet router.
First enable forwarding:
sudo sh -c 'printf "%s\n" "net.ipv4.ip_forward = 1" "net.ipv6.conf.all.forwarding = 1" > /etc/sysctl.d/99-tailscale.conf'
sudo sysctl -p /etc/sysctl.d/99-tailscale.conf
Then advertise the actual home subnet:
sudo tailscale set --advertise-routes=192.168.50.0/24Go to the Machines page in the Tailscale admin console to approve that route, and use grants to restrict which identities can access it. The Linux client also needs to explicitly accept the subnet route:
sudo tailscale set --accept-routesThe client’s own network must not overlap with the home subnet — for example, if both sides use 192.168.1.0/24, the routing becomes ambiguous. For the full configuration and a high-availability setup, see the Subnet routers documentation.
6. Common Troubleshooting
IPv6 Can Go Out But Not Come In
Check, in order: whether the ISP allows inbound traffic, the modem/router’s IPv6 firewall, the host’s own firewall, whether the service is listening on [::], and whether the DNS AAAA record still points to the current address. Don’t use the same home Wi-Fi as your only test environment.
The SSH Reverse Tunnel Fails to Start
Test from the home host with verbose logging:
ssh -vvv -NT -R 127.0.0.1:2022:127.0.0.1:22 [email protected]On the VPS, check sshd -t, journalctl -u sshd, and ss -lntp. Common causes include a PermitListen mismatch, the port already being in use, the host fingerprint not being written to the running user’s known_hosts, or ~ being used incorrectly in a systemd unit.
Cloudflare Tunnel Shows Healthy but Returns 502
Healthy only means cloudflared is connected to Cloudflare — it doesn’t mean it can reach the origin service. Test the Service URL from the host or container running cloudflared, focusing on the protocol, port, TLS certificate, and Docker network. localhost inside a container is almost always the first thing worth checking.
Tailscale Names Won’t Resolve, or Connections Are Refused
tailscale status
tailscale ping home-server
tailscale netcheck
For a naming issue, check MagicDNS; for a network refusal, check grants, device tags, and the target service’s listening address; for Tailscale SSH, also check the separate ssh policy. For a subnet router scenario, also check whether the route has been approved, and whether the Linux client has accepted the route.
7. Summary
The four approaches solve different problems:
- Tailscale is best suited for day-to-day remote access between authorized devices;
- Cloudflare Tunnel is best suited for web applications that need a domain name, identity verification, and edge protection;
- Public IPv6 is the most direct path, but the security responsibility falls entirely on the host and router;
- An SSH reverse tunnel is flexible and fully self-controlled, at the cost of ongoing VPS and tunnel maintenance.
Whichever you choose, stick to minimizing exposed surface area, key- or identity-based authentication, least privilege, and auditable logs. Establishing private access first, and only then deciding which services genuinely need to be public, is generally safer than “open the port first, harden it later.”