Visual Studio Code (VS Code for short) is currently one of the most popular code editors, known for being lightweight, fast, and powerful. This article gets you up and running quickly with VS Code, from installation to configuration, and on to using the essential extensions.
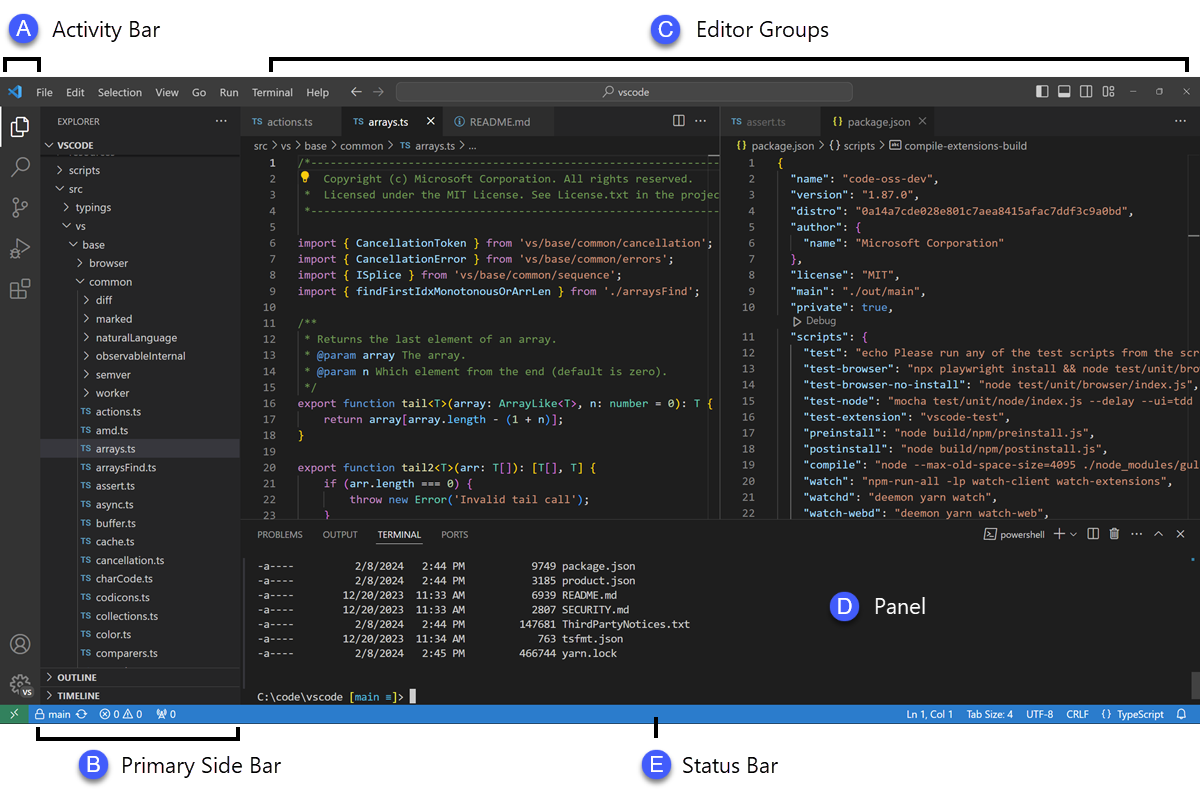
1. Installing VS Code
Installing VS Code is very simple:
- Visit the VS Code website
- Click the download button, and the site will automatically detect your operating system (macOS, Windows, or Linux)
- For macOS users:
- Download the
.dmgfile - Double-click to open it, and drag Visual Studio Code into the Applications folder
- The first time you open it, you may need to allow it to run under “System Preferences > Security & Privacy”
- Download the
- The first time it launches, VS Code automatically detects your system language and recommends a matching language pack

The whole installation process usually only takes a few minutes, and it’s ready to use immediately once done.
Tip: after installation, it’s worth enabling the code command in your terminal:
- Press
Cmd + Shift + Pto open the Command Palette - Type “Shell Command: Install ‘code’ command in PATH”
- After that, you can use
code .in the terminal to quickly open the current directory
2. Basic Configuration
VS Code’s settings are very flexible, and can be customized either through the graphical interface or by directly editing the settings file.
Opening Settings
There are two ways to open settings:
- Click the gear icon ⚙️ in the bottom left, and choose “Settings”
- Use the keyboard shortcut:
Cmd + ,

Common Settings
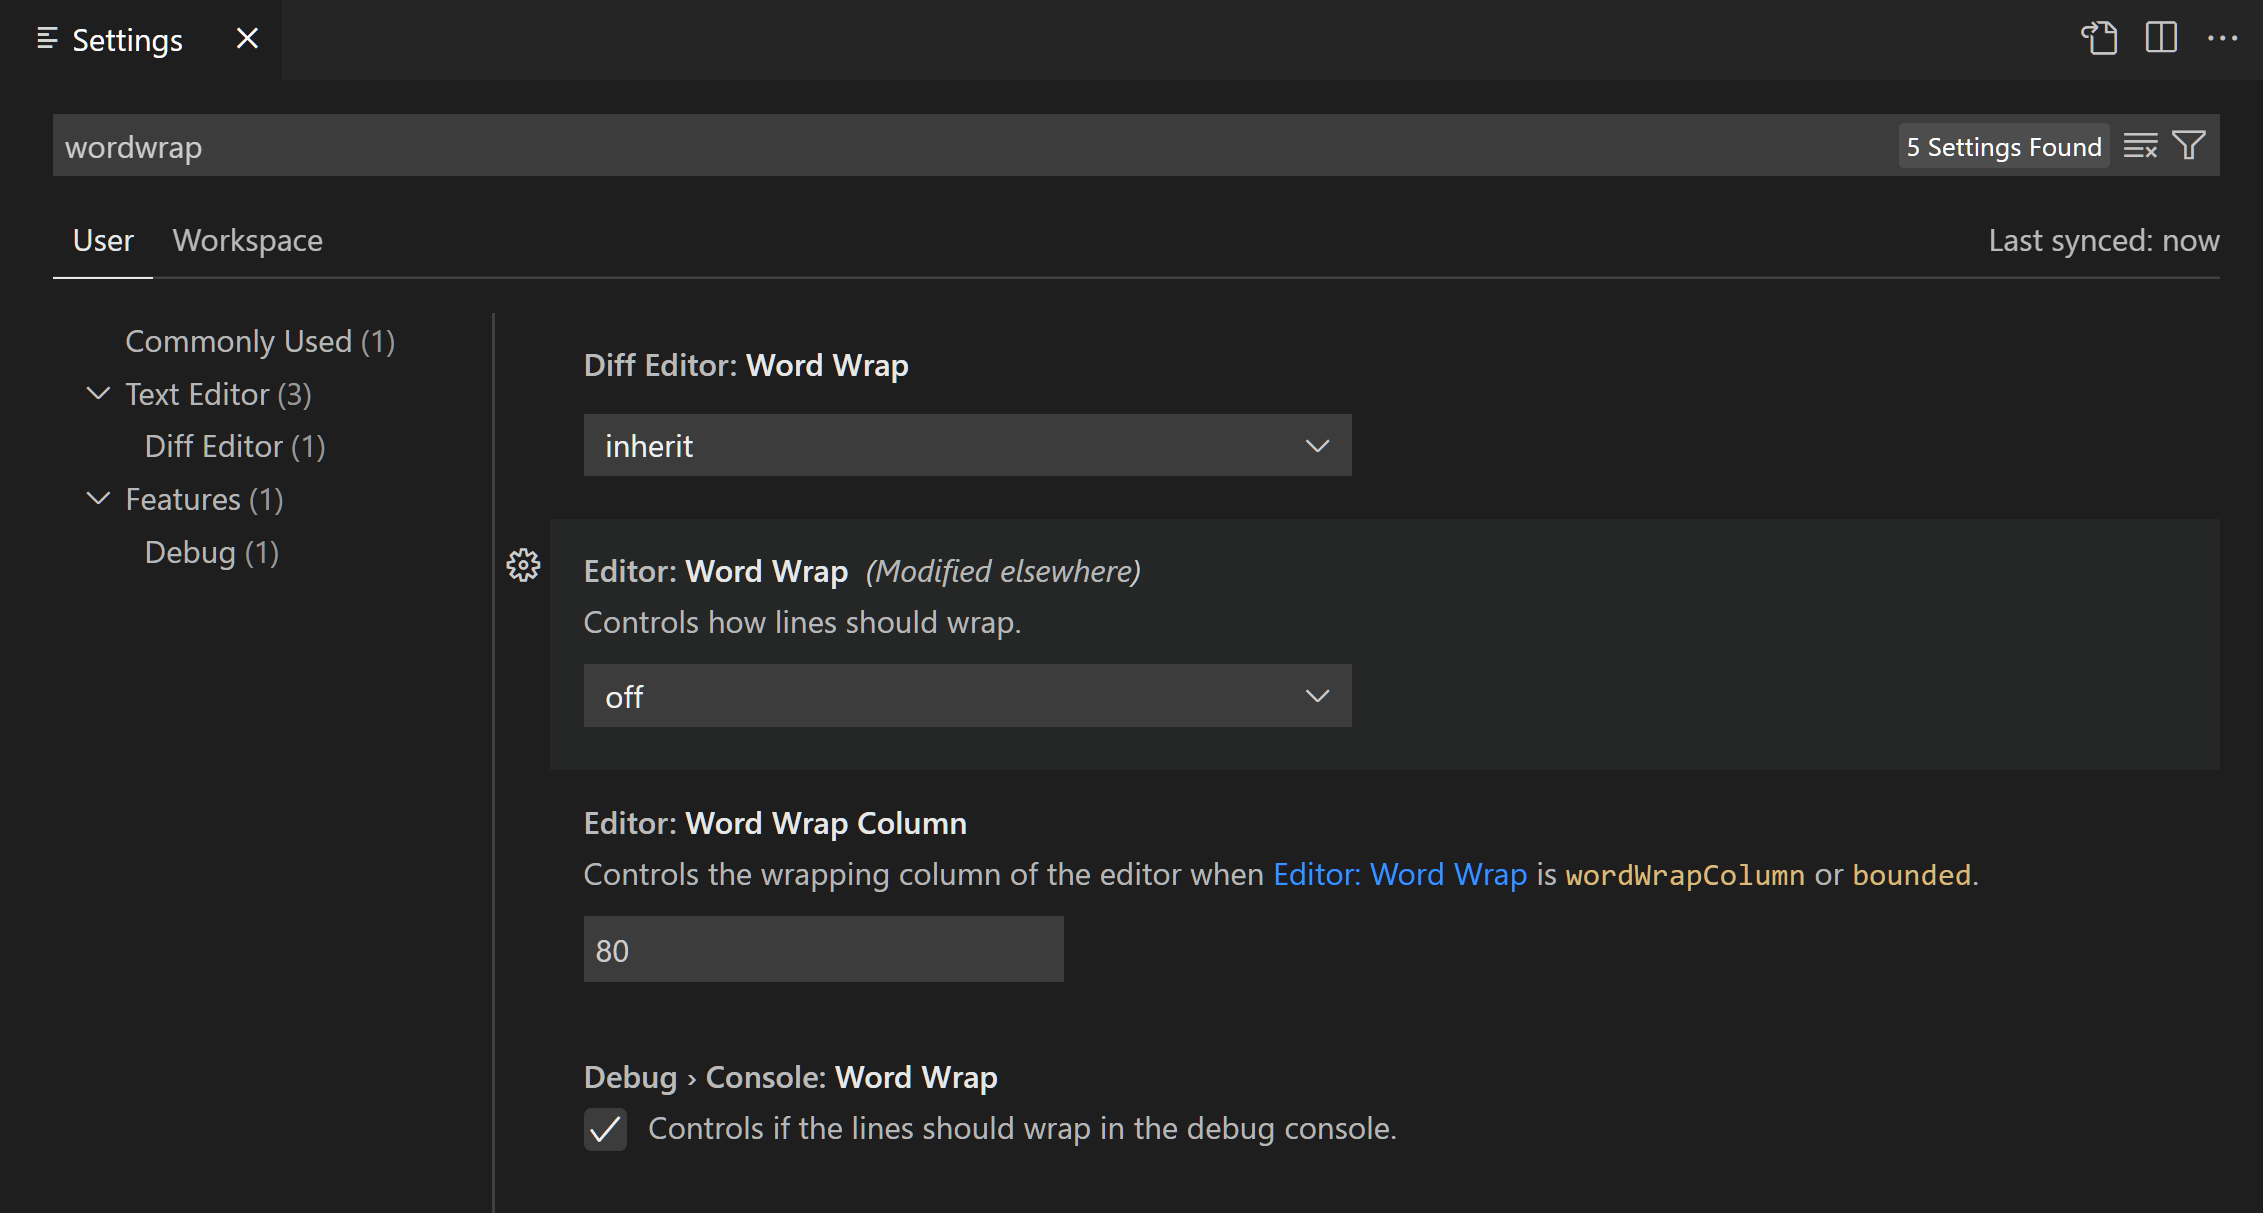
1. Indentation Settings
Search “indent” in settings to find the following options:
{
  "editor.tabSize": 4,  // number of spaces per Tab
  "editor.insertSpaces": true,  // use spaces instead of Tab
  "editor.detectIndentation": true  // automatically detect a file's indentation
}
If you prefer 2-space indentation (common in frontend development), you can set:
{
  "editor.tabSize": 2,
  "editor.insertSpaces": true
}
2. Font Settings
Search “font” to customize font-related settings:
{
  "editor.fontFamily": "Menlo, Monaco, 'Courier New', monospace",
  "editor.fontSize": 14,
  "editor.fontWeight": "normal",
  "editor.lineHeight": 22,
  "editor.fontLigatures": true  // enable ligatures
}
A few recommended fonts well suited for programming:
- Fira Code: supports ligatures, making code more visually pleasant
- JetBrains Mono: designed specifically for developers
- Cascadia Code: a programming font developed by Microsoft
- SF Mono: comes bundled with macOS, clean and elegant

3. Other Useful Settings
{
  "editor.wordWrap": "on",  // wrap lines automatically
  "editor.minimap.enabled": true,  // show the code minimap
  "editor.renderWhitespace": "selection",  // show whitespace
  "files.autoSave": "afterDelay",  // save automatically
  "files.autoSaveDelay": 1000,  // auto-save delay (in milliseconds)
  "editor.cursorBlinking": "smooth",  // smooth cursor blinking
  "editor.cursorSmoothCaretAnimation": "on",  // smooth cursor movement
  "workbench.colorTheme": "Dark+ (default dark)"  // theme
}
Editing the Settings File Directly
If you’d rather edit the JSON settings file directly:
- Press
Cmd + Shift + Pto open the Command Palette - Type “Preferences: Open User Settings (JSON)”
- Add or modify settings in the
settings.jsonfile that opens

3. Essential Extension Recommendations
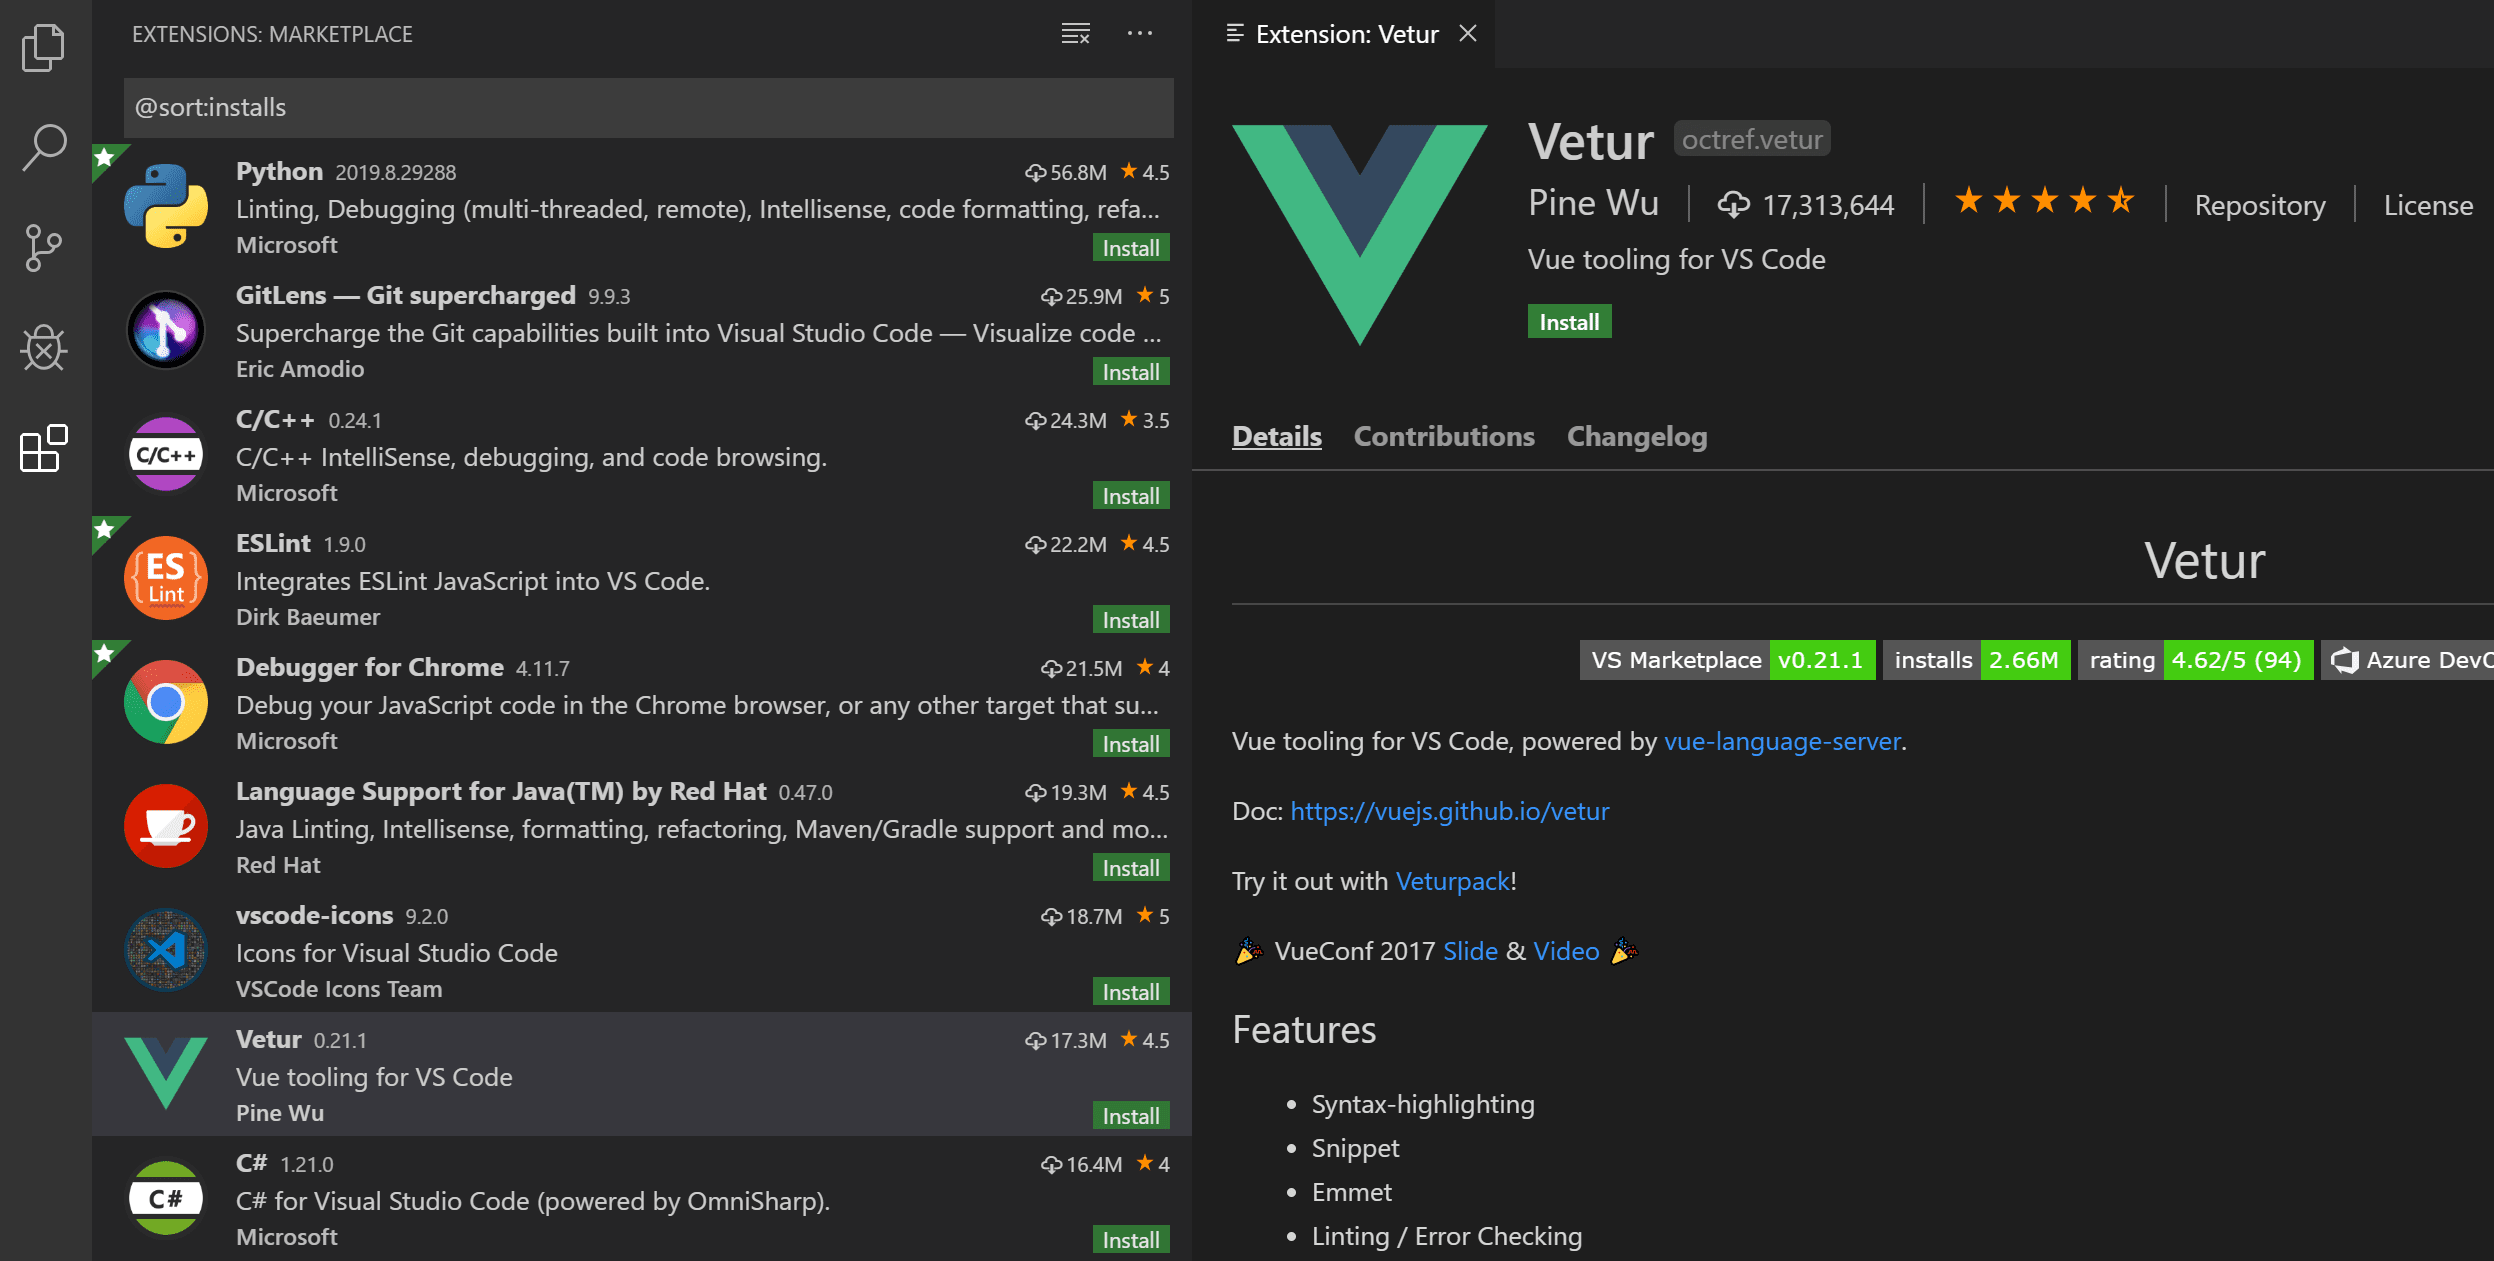
VS Code’s real strength lies in its rich extension ecosystem. Click the Extensions icon in the left activity bar (or press Cmd + Shift + X) to open the Extension Marketplace.
1. Remote - SSH
What it does: connects to a remote server over SSH, letting you edit remote files locally.
How to install:
- Search “Remote - SSH” in the Extension Marketplace
- Or install the “Remote Development” extension pack directly (which includes SSH, Containers, and WSL)

How to use it:
- Press
Cmd + Shift + Pto open the Command Palette - Type “Remote-SSH: Connect to Host”
- Enter the SSH connection info, e.g.
user@hostname - Enter the password to connect
Once connected, you can edit code on the remote server just like local files, and the terminal automatically connects to the remote environment too.
Common Issue: VS Code Server Download Failure
In certain network environments (such as servers in mainland China, or firewall restrictions), VS Code may fail to automatically download the VS Code Server onto the remote server, causing the connection to fail.
Symptoms:
- The connection gets stuck at the “Installing VS Code Server” step
- Shows a download timeout or connection failure
- The logs show that
https://update.code.visualstudio.com/can’t be reached
Solution 1: Download and Upload Manually
-
First check the local VS Code’s commit ID:
- Open the Command Palette (
Cmd + Shift + P) - Type “Remote-SSH: Show Log”
- Find information like
Downloading VS Code server... commit:xxxxxin the log - Or, in VS Code, select “Code” -> “About Visual Studio Code” to view the Commit ID
- Open the Command Palette (
-
Download the VS Code Server locally:
# Replace {commit_id} with the actual commit ID # Replace {platform} with the server platform: linux-x64, linux-arm64, alpine-x64, etc. https://update.code.visualstudio.com/commit:{commit_id}/server-{platform}/stable -
Upload it to the remote server:
# Upload the downloaded file to a temporary directory on the server scp vscode-server-linux-x64.tar.gz user@hostname:~/ -
Extract it into the correct directory on the server:
# SSH into the server ssh user@hostname # Create the VS Code Server directory mkdir -p ~/.vscode-server/bin/{commit_id} # Extract the archive tar -xzf ~/vscode-server-linux-x64.tar.gz -C ~/.vscode-server/bin/{commit_id} --strip-components 1 # Set execute permissions chmod +x ~/.vscode-server/bin/{commit_id}/node chmod +x ~/.vscode-server/bin/{commit_id}/bin/code-server -
Reconnect to the remote server from VS Code
Solution 2: Use a Mirror
You can set an environment variable to use a mirror in mainland China to speed up the download:
-
Edit
.bashrcor.zshrcon the remote server:export VSCODE_SERVER_DOWNLOAD_URL="https://vscode.cdn.azure.cn" -
Apply the change:
source ~/.bashrc -
Reconnect
Solution 3: Configure SSH to Use a Proxy
If you have a proxy available, you can configure it in your local SSH config:
Edit your local ~/.ssh/config file:
Host your-server
    HostName hostname
    User username
    # Use an HTTP proxy
    ProxyCommand nc -X connect -x proxy_host:proxy_port %h %p
    # Or use a SOCKS5 proxy
    # ProxyCommand nc -X 5 -x proxy_host:proxy_port %h %p
Solution 4: An Offline Installation Script
Create an automation script to simplify the installation process:
#!/bin/bash
# download-vscode-server.sh

COMMIT_ID="$1"
PLATFORM="${2:-linux-x64}"

if [ -z "$COMMIT_ID" ]; then
    echo "Usage: $0 <commit_id> [platform]"
    echo "Example: $0 abc123def456 linux-x64"
    exit 1
fi

# Download
echo "Downloading VS Code Server..."
wget "https://update.code.visualstudio.com/commit:${COMMIT_ID}/server-${PLATFORM}/stable" \
    -O vscode-server.tar.gz

# Create the directory
mkdir -p ~/.vscode-server/bin/${COMMIT_ID}

# Extract
echo "Extracting..."
tar -xzf vscode-server.tar.gz -C ~/.vscode-server/bin/${COMMIT_ID} --strip-components 1

# Set permissions
chmod +x ~/.vscode-server/bin/${COMMIT_ID}/node
chmod +x ~/.vscode-server/bin/${COMMIT_ID}/bin/code-server

echo "Installation complete!"
rm vscode-server.tar.gz
Usage:
./download-vscode-server.sh abc123def456 linux-x642. Markdown Preview Enhanced
What it does: live-previews Markdown files, supporting advanced features like math formulas and flowcharts.

How to use it:
- After opening a Markdown file, click the preview icon 📖 in the top right
- Or use the keyboard shortcut
Cmd + K V(pressCmd + K, release, then pressV) - You can also use
Cmd + Shift + Vto preview in the current editor
Key features:
- Supports LaTeX math formulas
- Supports Mermaid flowcharts
- Can export to PDF, HTML, and other formats
- Supports custom CSS styling
- Real-time synchronized scrolling
Example:
# Supports math formulas
$$E = mc^2$$
# Supports flowcharts
```mermaid
graph LR
A[Start] --> B[Process]
B --> C[End]
```3. GitHub Copilot (Codex)
What it does: an AI coding assistant that provides intelligent code completion and suggestions.
Note: GitHub Copilot is based on the OpenAI Codex model, and can generate code snippets based on context.

How to use it:
- Requires a GitHub account and a Copilot subscription (free for students and open-source maintainers)
- Install the “GitHub Copilot” extension
- Log into your GitHub account to authorize it
- As you start coding, Copilot automatically offers suggestions (shown as gray text)
- Press
Tabto accept a suggestion, orEscto dismiss it
Usage tips:
- Write detailed comments, and Copilot will generate corresponding code based on them
- Use
Option + ]to view the next suggestion - Use
Option + [to view the previous suggestion - Use
Option + \to view all suggestions
4. Python
What it does: provides Python language support, including intelligent hints, debugging, testing, and more.

Key features:
- IntelliSense code completion
- Code formatting (supports Black, autopep8, and others)
- Code linting (Pylint, Flake8, and others)
- A powerful debugger
- Jupyter Notebook support
- Virtual environment management
Example configuration:
{
  "python.defaultInterpreterPath": "/usr/local/bin/python3",
  "python.formatting.provider": "black",
  "python.linting.enabled": true,
  "python.linting.pylintEnabled": true,
  "python.analysis.typeCheckingMode": "basic"
}
Debugging features:
- Press
F5to start debugging - Press
Cmd + Shift + Dto open the Debug view - Click to the left of a line number to set a breakpoint
- Use the Debug Console to evaluate expressions

5. GitLens
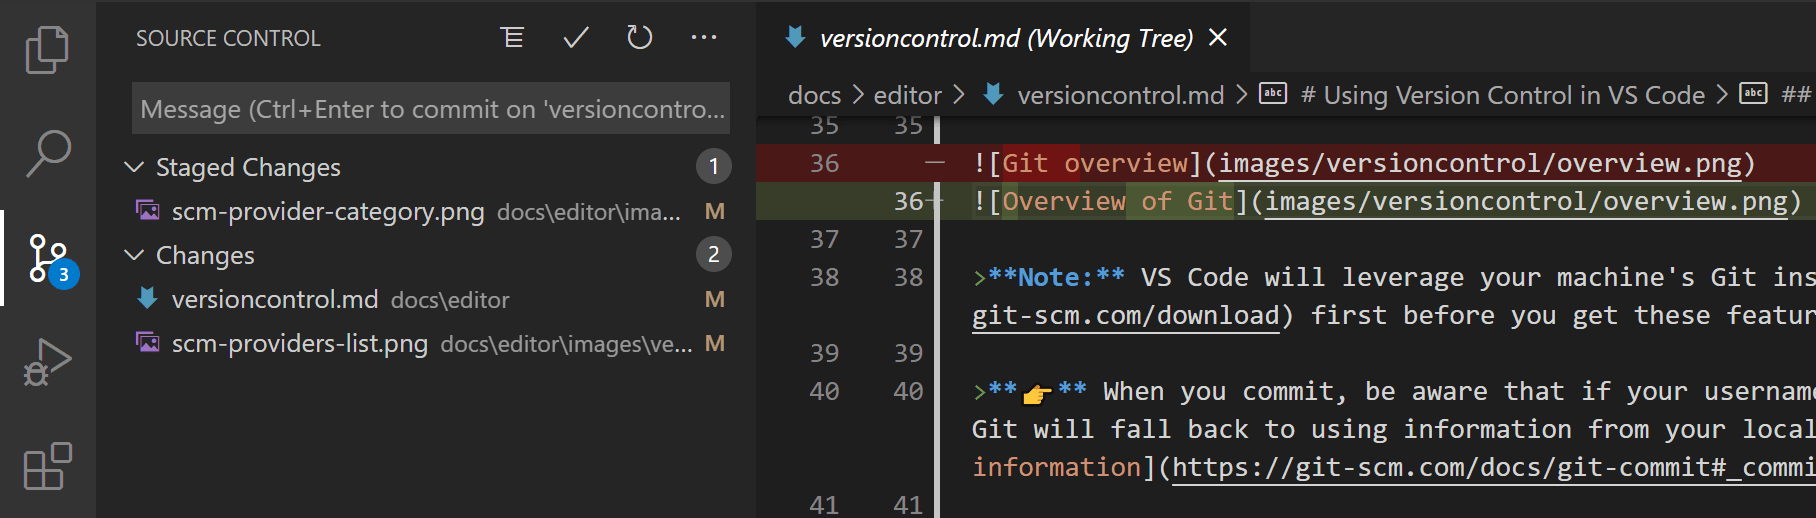
What it does: enhances Git functionality, visualizing code history and commit information.

Core features:
- Blame annotations: shows who last modified each line of code, and when, right next to it
- Code authorship info: hover to view detailed commit history
- File history: quickly browse all the modification records for a file
- Branch comparison: compare differences between different branches
- Commit search: powerful commit-history search functionality
- Visualized commit graph: graphically displays branch and merge history
Usage tips:
- Click the GitLens icon in the status bar to quickly switch features
- Use the GitLens view in the sidebar to browse the repository, file history, and more
- Click on commit information in a blame annotation to view the full commit details
- Use
Cmd + Shift + Gto open the Source Control view
4. Advanced Tips
Complete Keyboard Shortcuts (macOS)
Mastering keyboard shortcuts can dramatically improve your efficiency. Below are the most commonly used shortcuts:
General Operations
Cmd + P: quickly open a fileCmd + Shift + P: Command Palette (the most important shortcut!)Cmd + ,: open SettingsCmd + W: close the current tabCmd + K Cmd + S: open Keyboard Shortcuts settings
Editing
Cmd + /: comment/uncommentOption + ↑/↓: move the current line up/downShift + Option + ↑/↓: copy the current line up/downCmd + D: select the next occurrence of the same wordCmd + Shift + L: select all occurrences of the same wordCmd + [: decrease indentCmd + ]: increase indentCmd + Enter: insert a new line belowCmd + Shift + Enter: insert a new line above
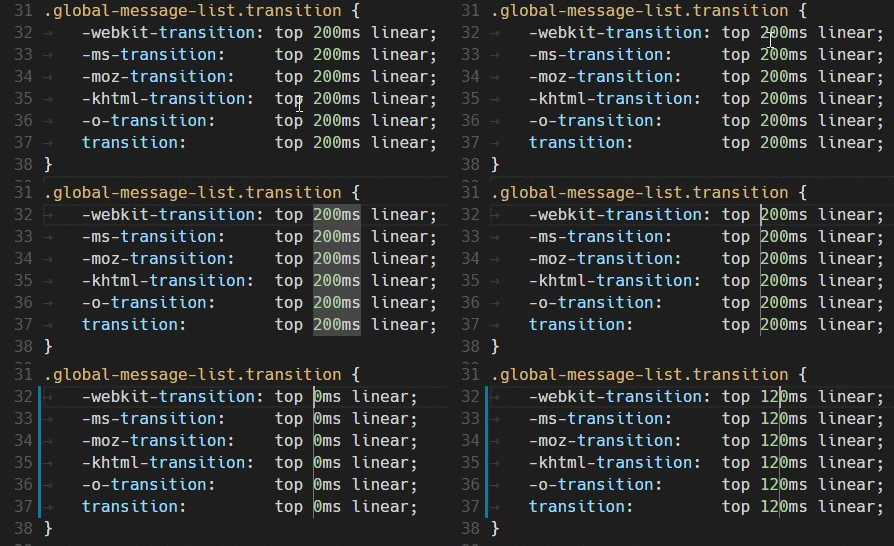
Multi-Cursor Editing
Option + Click: add a cursorCmd + Option + ↑/↓: add a cursor above/belowCmd + U: undo the last cursor operation
Search and Navigation
Cmd + F: find within the current fileCmd + Shift + F: find across the entire projectCmd + G: find nextCmd + Shift + G: find previousCmd + Option + F: find and replaceCtrl + G: go to a specific lineCmd + Shift + O: go to a symbol within the fileCmd + T: go to a symbol within the workspace
View Controls
Cmd + B: toggle the sidebarCmd + J: toggle the panelCmd + \: split the editorCmd + 1/2/3: focus editor group 1/2/3Ctrl + `: open/close the integrated terminalCmd + Shift + E: show ExplorerCmd + Shift + F: show SearchCmd + Shift + D: show DebugCmd + Shift + X: show Extensions
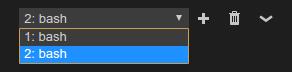
Terminal Operations
Ctrl + `: open/close the terminalCmd + Shift + `: create a new terminalCmd + `: switch between terminals
Tip: press Cmd + K Cmd + S to open Keyboard Shortcuts settings, where you can search for any command and customize its shortcut.
Code Snippets
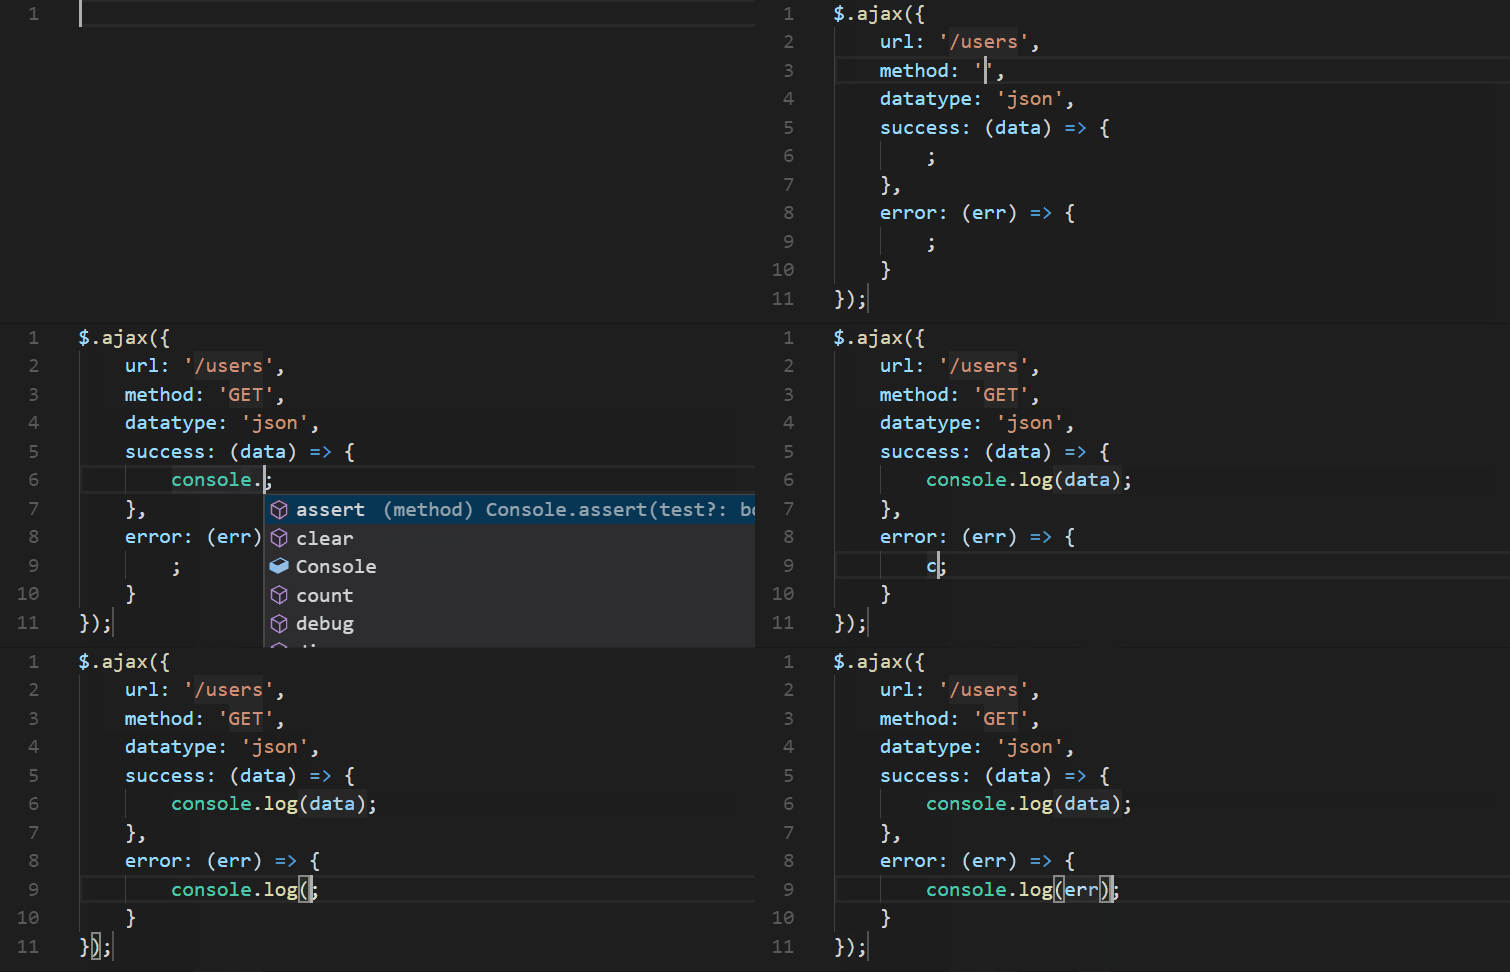
Code snippets are a powerful feature that lets you quickly insert predefined code templates, greatly improving your coding efficiency.
Creating a Custom Snippet
- Press
Cmd + Shift + Pto open the Command Palette - Type “Snippets: Configure User Snippets”
- Choose a language, or create a global snippet
- Define the snippet in the JSON file that opens
Snippet Syntax Example
Taking Python as an example, here’s a function template:
{
  "Python Function": {
    "prefix": "deff",
    "body": [
      "def ${1:function_name}(${2:parameters}):",
      "    \"\"\"${3:Description}",
      "    ",
      "    Args:",
      "        ${2:parameters}: ${4:parameter description}",
      "    ",
      "    Returns:",
      "        ${5:return description}",
      "    \"\"\"",
      "    ${6:pass}",
      "$0"
    ],
    "description": "Create a Python function with docstring"
  },
  "Python Main": {
    "prefix": "main",
    "body": [
      "if __name__ == '__main__':",
      "    ${1:main()}"
    ],
    "description": "Main entry point"
  }
}
JavaScript/TypeScript Example
{
  "Console Log": {
    "prefix": "clg",
    "body": [
      "console.log('${1:message}:', $2);"
    ],
    "description": "Log to console"
  },
  "Arrow Function": {
    "prefix": "af",
    "body": [
      "const ${1:functionName} = (${2:params}) => {",
      "    ${3:// body}",
      "};"
    ],
    "description": "Create arrow function"
  },
  "React Component": {
    "prefix": "rfc",
    "body": [
      "import React from 'react';",
      "",
      "const ${1:ComponentName} = () => {",
      "    return (",
      "        <div>",
      "            ${2:content}",
      "        </div>",
      "    );",
      "};",
      "",
      "export default ${1:ComponentName};"
    ],
    "description": "Create React functional component"
  }
}
Snippet Syntax Reference
prefix: the keyword that triggers the snippetbody: the snippet’s content (as an array, one element per line)description: the snippet’s description (shown in the completion hint)$1,$2,$3: tab stops, letting you jump between them by pressing Tab${1:default}: a placeholder with a default value$0: the final cursor position${1|option1,option2,option3|}: a dropdown selection of options
Using a Snippet
- Type the keyword defined in
prefixin the editor - Press
TaborEnterto trigger the snippet - Press
Tabto jump between the various placeholders - Once done filling them in, press
Escto exit snippet mode
Common Variables
Snippets also support a set of predefined variables:
{
  "File Header": {
    "prefix": "header",
    "body": [
      "/**",
      " * @file $TM_FILENAME",
      " * @author ${1:Your Name}",
      " * @date $CURRENT_YEAR-$CURRENT_MONTH-$CURRENT_DATE",
      " * @description ${2:File description}",
      " */",
      "",
      "$0"
    ],
    "description": "File header comment"
  }
}
Common variables include:
$TM_FILENAME: the current filename$TM_FILENAME_BASE: the filename without its extension$TM_DIRECTORY: the current directory$TM_FILEPATH: the full file path$CURRENT_YEAR: the current year (4 digits)$CURRENT_MONTH: the current month (2 digits)$CURRENT_DATE: the current date (2 digits)$CURRENT_HOUR: the current hour (24-hour format)$CLIPBOARD: the clipboard’s content$WORKSPACE_NAME: the workspace’s name
Workspace Settings
Beyond user settings, VS Code also supports workspace settings, which is useful when different projects need different configurations.
Advantages of workspace settings:
- Different settings can be customized for each project
- Settings can be committed to version control and shared across a team
- Workspace settings take priority over user settings
Creating workspace settings:
- Create a
.vscodefolder at the project root - Create a
settings.jsonfile inside it - Add project-specific settings
Example configuration:
{
  "editor.tabSize": 2,
  "python.defaultInterpreterPath": "./venv/bin/python",
  "files.exclude": {
    "**/__pycache__": true,
    "**/*.pyc": true
  }
}
Zen Mode and Focus Mode
VS Code offers several focus modes to help you concentrate while coding:
Zen Mode:
- Shortcut:
Cmd + K Z - Hides all UI elements, showing only the editor
- Press
Esc Escto exit
Centered Layout:
- Search “Toggle Centered Layout” in the Command Palette
- Centers the editor’s content

5. Themes and Customization
Recommended Themes
VS Code has a rich selection of themes to choose from:
Popular dark themes:
- One Dark Pro: a classic theme based on Atom
- Dracula Official: a gentle purple palette
- Material Theme: Material Design style
- Night Owl: a color scheme optimized for night owls
- Tokyo Night: inspired by the Tokyo Night terminal theme
Popular light themes:
- GitHub Theme: GitHub’s own style
- One Light: clean and bright
- Material Theme Lighter: the light version of Material
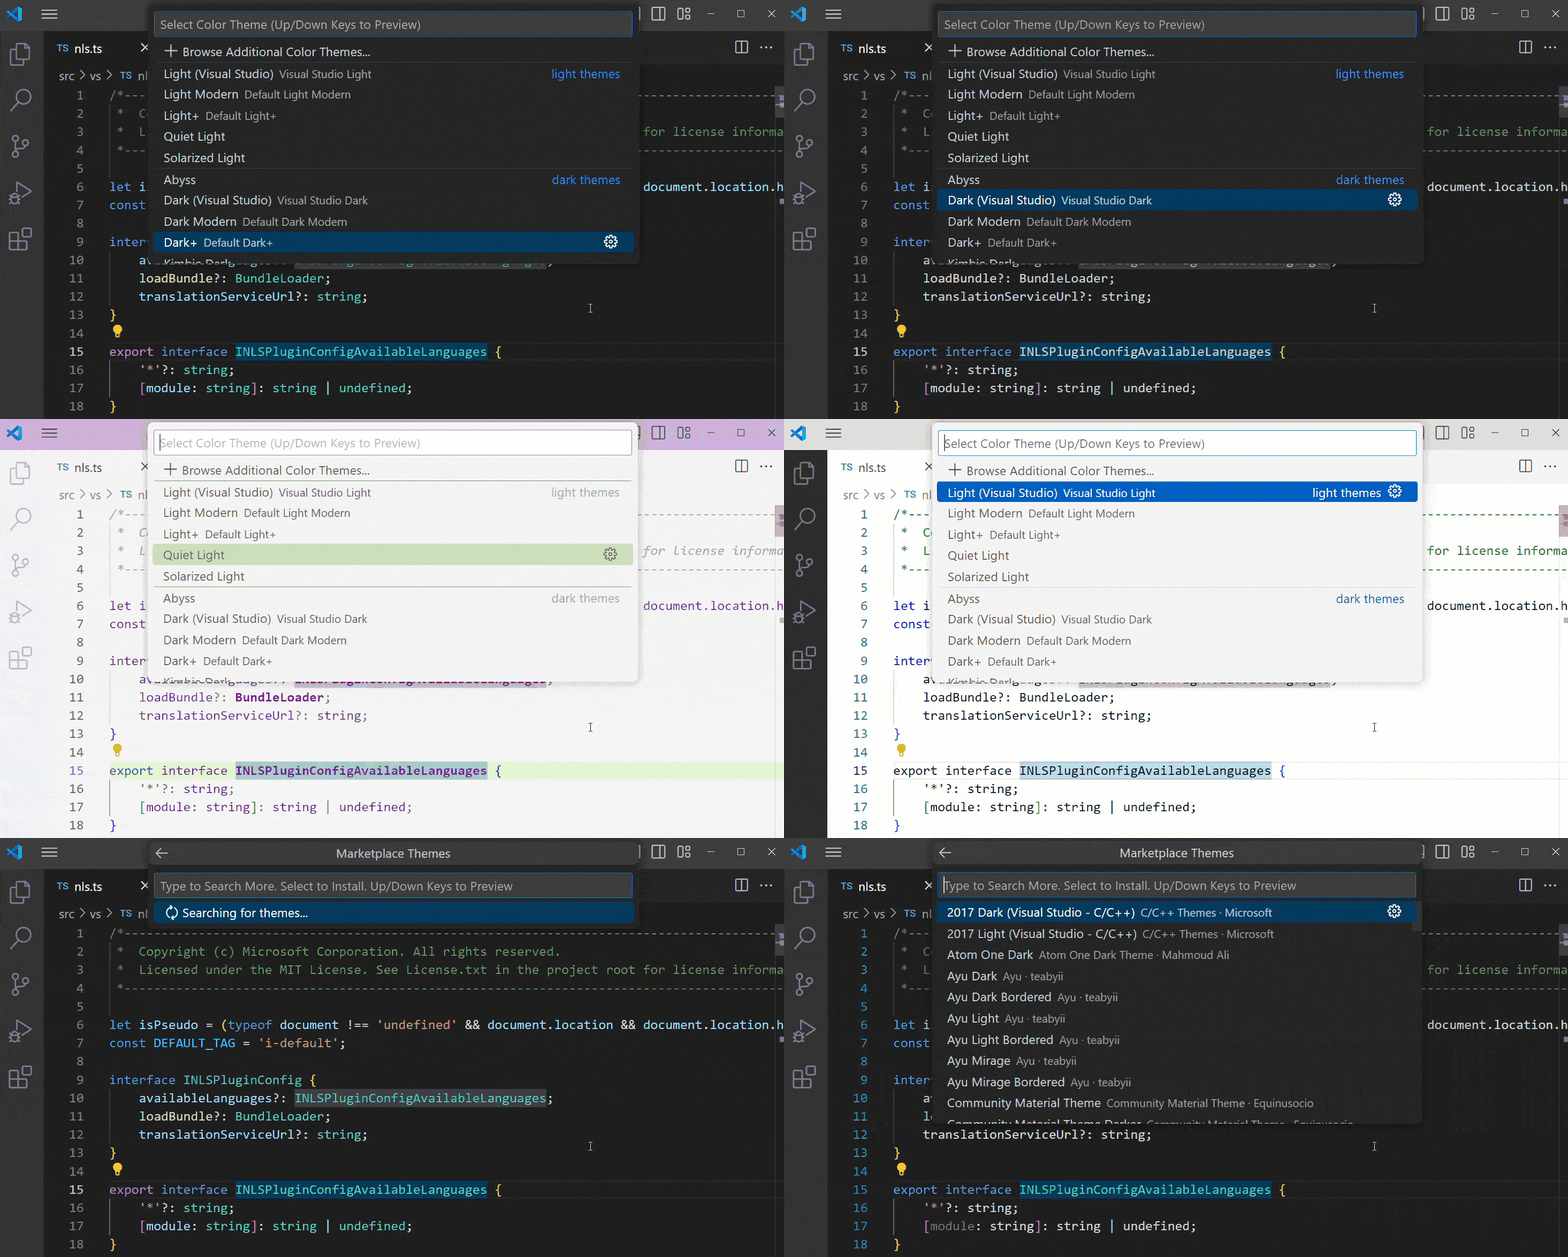
Installing a theme:
- Press
Cmd + K Cmd + Tto open the theme picker - Or search for the theme’s name in the Extension Marketplace
- Click install and apply it
File Icon Themes
Besides color themes, you can also customize file icons:
Recommended icon themes:
- Material Icon Theme: the most popular icon theme
- vscode-icons: detailed file-type icons
- Monokai Pro Icons: clean and modern
Installation: search for and install it from the Extension Marketplace, then select “File Icon Theme” from the Command Palette.
Summary
VS Code is a powerful, highly customizable editor. With a sensible configuration and the right extensions installed, you can build a development environment that fully matches your personal habits.
Learning suggestions:
- First get familiar with the basic features and common shortcuts
- Gradually add necessary extensions — don’t install too many at once
- Regularly check the official documentation and changelogs to discover new features
- Customize your own code snippets to improve coding efficiency
- Join the VS Code community to learn from others’ configurations and tips
Remember, the best configuration is the one that suits you best. Don’t blindly chase the number of extensions installed — just pick the tools that genuinely improve your productivity.
Useful resources:
- VS Code official documentation
- Keyboard shortcuts cheat sheet (PDF)
- VS Code Can Do That? - a collection of practical tips
Enjoy using it! 🚀