Learning shell scripting requires some basic understanding of what a shell actually is. This article starts from the history of computing to introduce how various shells came to be. By the time you start learning Linux shell scripting, you’ll want to know the differences between common shells like bash/zsh, and the various ways a shell can be logged into.
1. Starting with the Terminal
Shell commands run inside a terminal, so any discussion of the shell inevitably involves the terminal. Some translate “terminal” as “command line,” which nicely captures what the tool does: it accepts command input, shows the command executing, and presents the command’s output.
Every common operating system has a terminal: macOS has Terminal.app, Linux has gnome-terminal, and Windows has Windows Terminal.
1.1 The Terminal — From Hardware to Software
To understand the terminal, you need a bit of computing history. Under the von Neumann architecture, a computer is divided into input, output, storage, control, and computation. Early computers were enormous, and these parts were physically separate. Input and output relied on paper tape: reading the holes punched in the tape provided input, and once the computer finished computing, it punched holes into tape to produce output. Using this was extremely cumbersome — the excellent programmers of that era wrote raw 01 machine code directly.
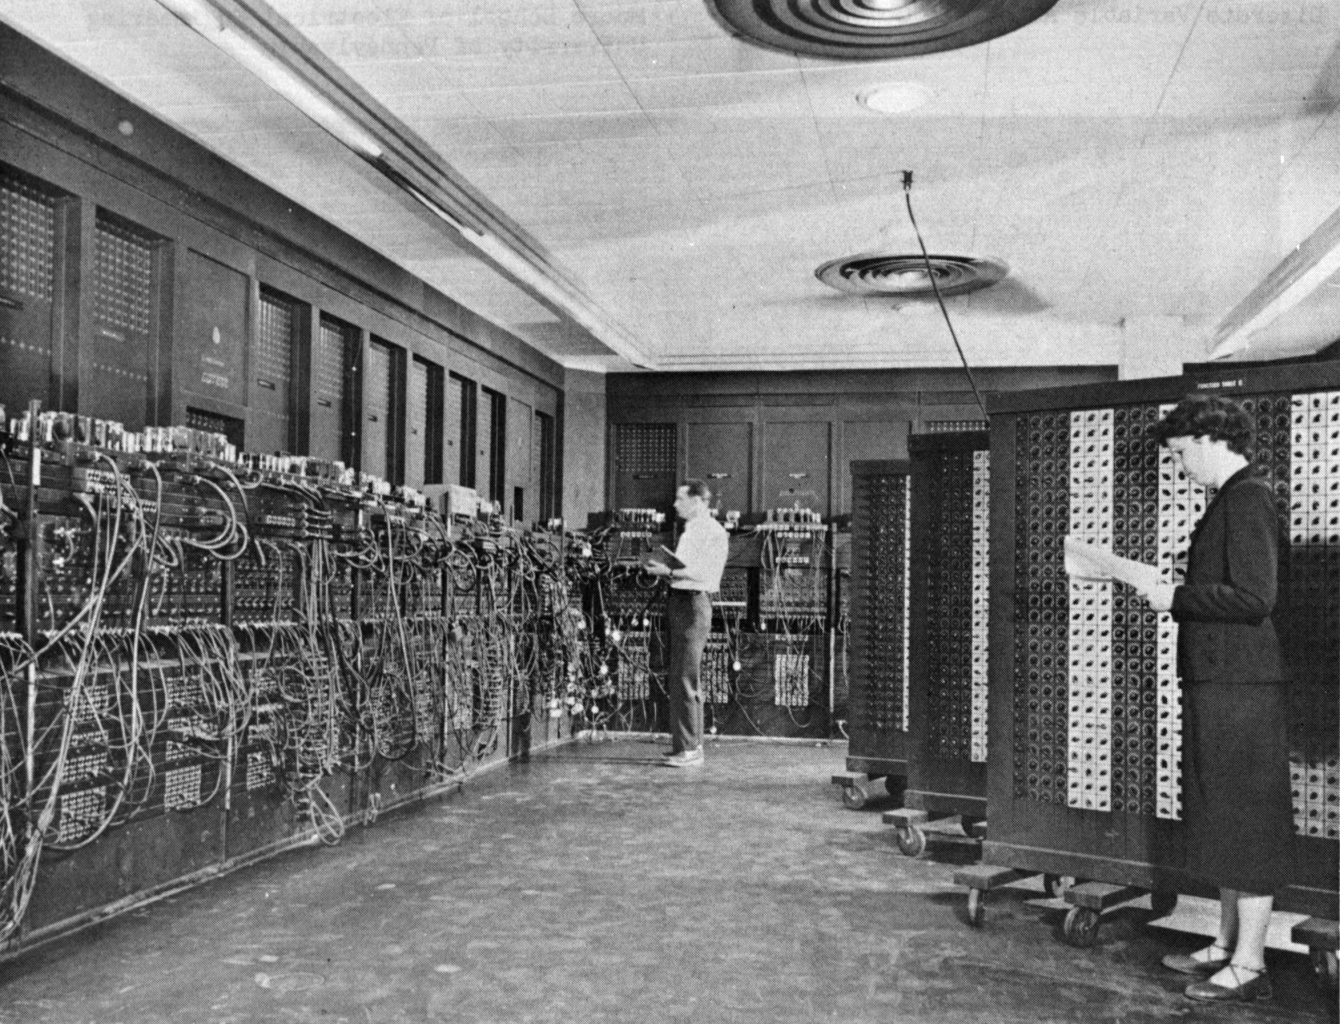

Writing one program burned through a pile of paper tape, and revising and rerunning the program meant punching a fresh tape. It was like writing with a pen on paper — a mistake could only be crossed out (I’d guess something like correction tape may have existed). This clearly wasn’t something a sane person would want to keep doing — it was hard to read, hard to write, and debugging it was out of the question.
As computers developed, the keyboard became the computer’s input and the display became its output. Combined together and connected to the mainframe by cable, the keyboard fed input in, the mainframe executed it, and the display showed the result. This approach was far more efficient than paper tape, much easier to revise, and made human-computer interaction dramatically easier — nowhere near as painful as paper tape. As the saying might go: today we have “keyboard warriors,” but in the old days there were no “paper-tape warriors” — and that’s the honest truth.
The device made up of a keyboard and a display is the terminal. Strictly speaking they aren’t part of the computer itself (the “computer” proper is really the part doing the computation in the middle) — but once you had them (meaning the keyboard and display together), human-computer interaction became vastly more efficient. So could you set up a similar device for the computer itself — one that could output logs, show status, and print errors even at boot time? Of course you could! This kind of special “terminal” is what’s called a console. Through this special terminal, the entire computer can be controlled.
As technology advanced further, computing entered the integrated-circuit era: all sorts of circuitry got packed onto chips, computers kept shrinking, and microcomputers became increasingly popular.
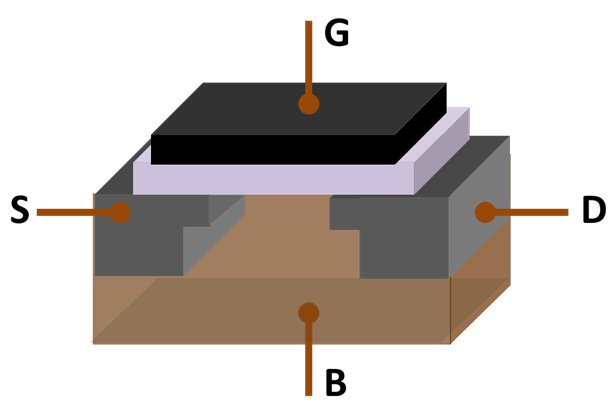
The structure of a MOSFET transistor, image from Wikipedia

What used to be a massive machine can now be carried around in your pocket. The keyboard and display became standard equipment on every computer. The kind of device that could only interact with a mainframe eventually faded entirely from history — hardware terminals disappeared completely, replaced by software terminals: a piece of software running on a microcomputer that emulates a terminal to interact with the host.
1.2 The Keyboard and TTY
On Linux, opening a terminal automatically starts a shell (such as Bash), and also shows a tty:
Last login: Mon Sep 20 10:34:38 on ttys006What does TTY mean? That goes back to the keyboard. The earliest keyboards were purely mechanical, printing ink directly onto paper. They solved the problem of information input, but not the problem of remote output — transmitting information from one device to another.
Communication technology was developing in parallel, and by then the teletype (teletypewriter) already existed, capable of:
- Accepting input locally via a keyboard
- Displaying the typed result locally on paper
- Transmitting the locally-entered result to another device, to be recognized by that device
- Receiving output from another device and translating it into something a human can read
This device is what’s called a TTY — translating the abbreviation literally gives something like “remote input” or “remote typing.” Calling it a “teletypewriter” reflects the fact that what it transmits is an electrical signal.
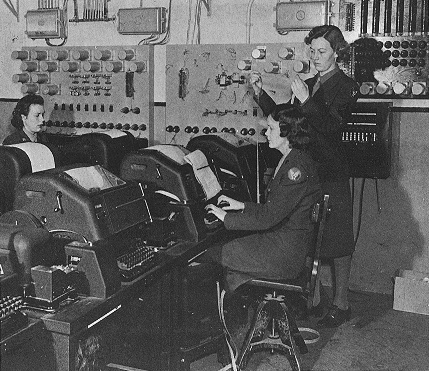
A teletype used during World War II image from Wikipedia

Before computers existed, people had already built an “internet” with teletypewriters as its nodes — one that could exchange stock data. Once computers began to develop, people also found they needed to interact with them, so the TTY was borrowed directly to serve as the computer’s input/output component. A TTY can operate independently of computation — it was never actually part of the computer; today’s servers can run perfectly well without a keyboard or display attached.
In some situations, though, you’re still forced to rely on a keyboard and display for operation. If a server has crashed and needs attention, you need to hook up a display and keyboard to it to diagnose the problem. In this case, that kind of terminal is also treated as a console — its role is to output the computer’s basic information, and it counts as part of the computer itself. These days, of course, terminal and console aren’t sharply distinguished — both are just tools for interacting with the computer.
Modern systems still have a tty command, used to display the current terminal:
tty
/dev/ttys009
On Linux, you can press Alt + Ctrl + F{2,6} to switch to different TTYs. How many TTYs are there? Check the /dev/ directory and look at the tty files inside it. On Linux, everything is a file, and TTYs are no exception — you can even write information into a TTY:
echo "hello" >> /dev/tty1The who command shows every currently logged-in terminal, and echoing content into /dev/tty{n} will display it on the corresponding terminal.
When you SSH in and run tty, the result you get back is usually something under pts, short for pseudo terminal. In the kernel, this has two parts: the master side, and the slave side implemented in the tty driver. Under SSH, running tty will show /dev/pts/..., and you can likewise write into /dev/pts to send information to that terminal.
2. What Is a Shell
The previous section covered the terminal, through which you interact with the computer. In reality, the terminal doesn’t control the hardware directly either — it interacts with the operating system kernel, and it’s the kernel that controls the hardware.
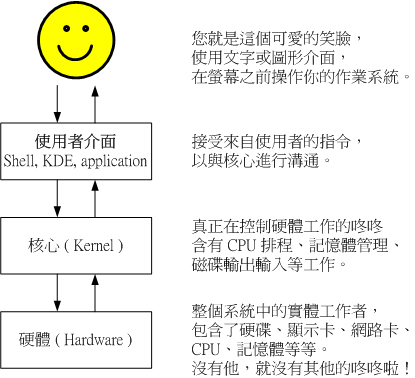
The operating system kernel, image from Bird’s Linux Private Kitchen
The reason an operating system exists as this intermediary is, fundamentally, that a computer system is too complex — if every single operation had to directly manipulate the computer’s hardware, that complexity would be unmanageable. Electronic computers primarily rely on the high and low voltages produced by electrons moving through transistors, and the newest CPUs today can integrate on the order of a billion transistors — writing code by manually operating at that level would take until the end of time.
The solution is layers upon layers of abstraction: you just issue instructions to the operating system, and it handles the rest for you. The shell is the channel through which we send instructions to the operating system.
In the broad sense, any program capable of sending information to the operating system to accomplish some function is a shell — things like the various pieces of software on Windows/macOS, Windows File Explorer, Finder on Mac, or the text-interface shell programs on Linux/Unix. In the narrow sense, “shell” refers specifically to the C-language programs on Linux/Unix, such as Bash/Zsh. This article uses Bash/Zsh as representatives to introduce the narrow-sense shell.
2.1 Reasons to Use a Shell
- Most servers run Linux/Unix, and the shell is their native way of being managed.
- The shell communicates over a text interface, which requires relatively little bandwidth.
- Using the shell skillfully can significantly improve efficiency.
3. Ways to Log Into a Shell
There are several ways to use a shell:
- Logging into the Linux system via a text interface
- Opening a terminal directly from within a graphical interface
- Logging into a remote server via SSH
- Running a shell script
The scenarios above can be broken down: by whether a password is required to log in, they split into login and non-login; by whether you’re executing a file versus a single command, they split into interactive and non-interactive.
3.1 Login vs. Non-Login
The difference between login and non-login shells lies in which files get read on startup and exit.
3.1.1 Login Shells
On a local Linux machine, opening a terminal right after entering the system is called non-login, since it doesn’t require entering an account and password. Bash has the following configuration files:
/etc/profile
~/.bash_profile
~/.bash_login
~/.profile
~/.bash_logout
For a login shell, two files are typically read:
/etc/profile— system-wide configuration, which generally shouldn’t be modified.- One of
~/.bash_profile,~/.bash_login, or~/.profile— reading stops as soon as one of these is found.
What people usually actually configure, though, is ~/.bashrc. Here rc stands for “run commands.” But ~/.bashrc isn’t any of the three files listed above. The trick lies inside ~/.bash_profile:
cat ~/.bashrc
# .bash_profile

# Get the aliases and functions
if [ -f ~/.bashrc ]; then
	. ~/.bashrc
fi

# User specific environment and startup programs
It directly sources the ~/.bashrc file.
3.1.2 Non-Login Shells
A non-login shell only reads the single configuration file ~/.bashrc.
3.1.3 Environment Variables When Switching with su
On Linux, you switch users with the su command — su stands for “switch user.” Normally, running su alone only switches the user, without switching anything else. Running su -, on the other hand, switches fully to the root account, environment variables included.
3.2 Interactive vs. Non-Interactive
3.2.1 Interactive Execution
Interactive execution means: type a command, run it, and get the output or an error back. This is the default state when you open a command-line tool or SSH in directly. The advantage is that you get an immediate result or error. Section 5 below goes into detail on configuring an interactive shell.
3.2.2 Non-Interactive Execution
Simply put, this means running a shell script. You write the commands you want to run, in order, into a file — that file is the shell script — and then have the shell invoke that script, running the commands inside it from top to bottom. The benefit of a shell script is being able to quickly reuse commands, for scenarios such as:
- The same command needs to run 100 times, but the command itself doesn’t offer a looping parameter — for example, renaming 100 files according to a rule.
- The command you’re running is fairly long, and you need to tweak a parameter in the first few steps before running the rest to get a result.
- A command that ran on computer A needs to run again, exactly as-is, on computer B (or several other computers).
If you were to do this interactively, you’d have to keep hammering the keyboard to execute each step — no different from clicking a mouse over and over, with limited gains in efficiency. Running a file instead is the non-interactive approach, which simplifies execution considerably. Non-interactive execution starts a new thread to run the shell commands, and once execution hits EOF, that thread exits.
4. Shell Scripts
Non-interactive execution requires specifically learning shell script syntax: with it, you can also extend commands — for example, running a command in a loop, or running commands conditionally. The learning curve for shell scripting is somewhat steep:
- It’s extremely sensitive to whitespace.
In a shell script, whether or not there’s a space around the equals sign (
=) means something completely different, and mistakes of this kind are very hard to spot at first. - Error messages are overly terse. If you run into a whitespace problem, the error won’t tell you a space is missing — it’ll say a command is missing instead.
- Execution continues past errors. Most programming languages stop execution when they hit an error; shell scripts skip past the error and keep going, so an earlier wrong result can affect everything that follows — if you don’t carefully check the logs, you won’t know where the error actually happened.
- There’s a lack of convenient debugging tools. Debugging isn’t very convenient, and often ends up happening live, during execution. Run it once, debug, and by the time you run it again the environment has already changed.
5. Zsh Configuration
Of course, interactive shells are also a widely used tool.
sh is the oldest shell, and it’s barely used these days. The most popular version currently is Bash (Bourne Again Shell), though Bash is hard to use effectively without configuration. Other common shells include Zsh, Fish, Ksh, and Tcsh. Zsh is generally the recommended choice — compared to Bash, it has better completion and directory-jumping features. Paired with the oh-my-zsh plugin framework, it can substantially improve your efficiency. Zsh is installed like this:
sudo dnf install zshAfter installing zsh, you need to switch the system’s default login shell to zsh:
sudo chsh -s /usr/bin/zsh user_nameSet up oh-my-zsh:
sh -c "$(curl -fsSL https://raw.github.com/ohmyzsh/ohmyzsh/master/tools/install.sh)"To set up oh-my-zsh plugins, find the ~/.zshrc file and add to plugins:
plugins=(
   git
   extract
   zsh-syntax-highlighting
   zsh-autosuggestions
 )
Summary
This article mainly introduced the basic concepts of the shell, addressing the groundwork needed before actually using one. It first introduced concepts like the terminal and TTY, then covered the interactive and non-interactive ways of running a shell, and finally covered zsh configuration for interactive use, including setting up oh-my-zsh.